Set up email using Outlook for Android app
-
Do you have Outlook for Android installed on your device?
-
If it's not installed on your device, download Outlook for Android from the Google Play Store. Open the app. If you want an introduction, tap Product Tour, or tap, Get Started.
-
If it is installed on your device, open the app, and then tap tap the navigation control at the bottom of your device, or tap More
 > Settings > Add Account.
-
-
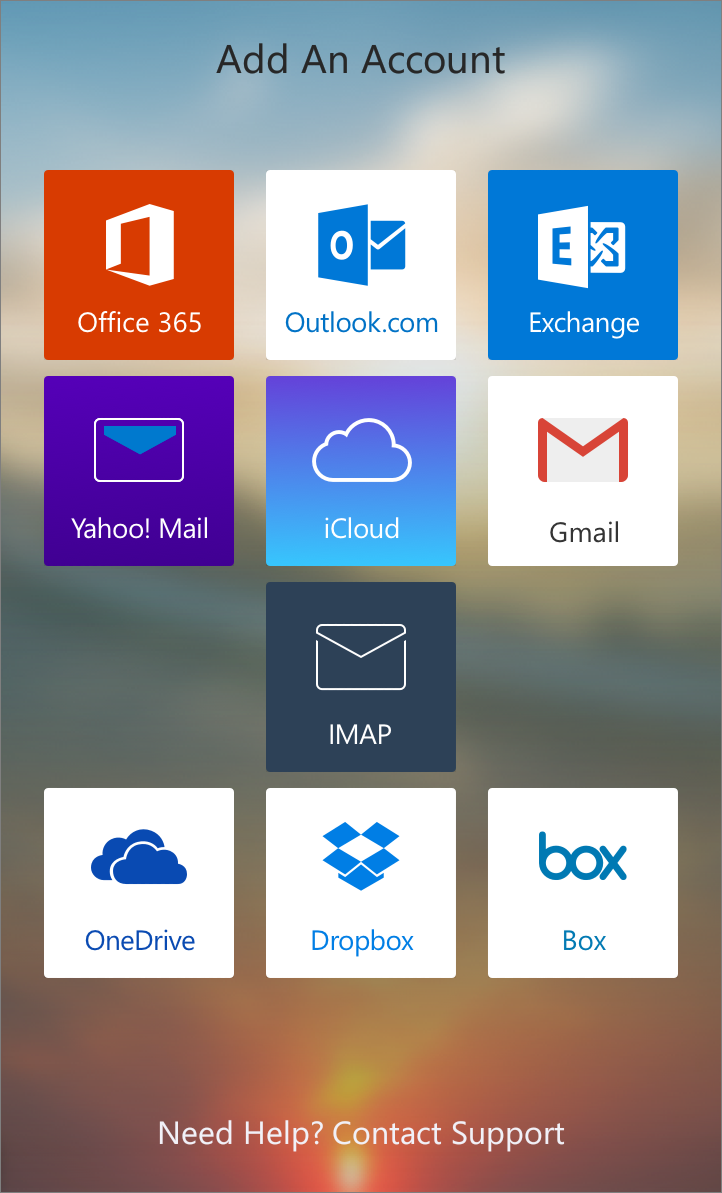
On the Add An Account page, select the mail account you want to add:
-
Tap Outlook.com if you have an Outlook email account ending with @outlook.com, @hotmail.com, @msn.com, or @live.com.
NOTE This includes international domains, such as @outlook.co.uk, or any custom domains hosted on Outlook.com.
-
Tap Exchange if you have a work or school account in Office 365 for business or another Exchange-based mail account.
-
Tap one of the other options if you have a different mail account. For example, tap Gmail if you want to add a Gmail account.

-
-
Enter your full email address, for example tony@contoso.com, type your password, and then tap Sign in.
-
The account will be added, and Outlook for Android will begin to sync to the email account.
To learn more about using Outlook for Android, tap the navigation control at the bottom of your device, or tapMore  > Help. Or, use your browser and go to Frequently asked questions about Outlook for iOS and Android.
Set up email using the Android mail app
-
Tap Settings > Accounts > Add account > Email. This application might be named Mail on some versions of Android.
-
Enter your full email address, for example tony@contoso.com, and your password, and then tap Next.
NOTE This includes international domains, such as @outlook.co.uk, or any custom domains hosted on Outlook.com.
-
As soon as the device verifies the server settings, the Account Options page opens. Select the options for how you want to receive your mail, and then tap Next.
-
Give the account a name, and then tap Done.
-
Tap Settings > Accounts > Add account > Email. This application might be named Mail on some versions of Android.

-
Type your full email address, for example tony@contoso.com, type your password, and then tap Next.
-
Select Exchange.
-
If prompted, accept the defaults on the Exchange server settings page, and tap Next. If your device can't connect, enter the following account information, and then select Next.
-
Domain\Username Type your full email address in this box, for example, tony@contoso.com. If Domainand Username are separate text boxes in your version of Android, leave the Domain box empty, and type your full email address in the Username box.
-
Password Use the password that you use to access your account.
-
Exchange Server Use the address of your Exchange server. If you aren't sure what your server address is, check with your administrator. The server for Office 365 for business is outlook.office365.com.
-
As soon as the device verifies the server settings, the Account Options page opens. Select the options for how you want to receive your mail, and then tap Next. (You may need to scroll down to see Next.)
-
-
If you see Activate device administrator? page, select Activate.
-
Give the account a name, and then tap Done.
TIP You might need to wait ten to fifteen minutes after you set up your account before you can send or receive email.
-
From the Applications menu, select Email. This application may be named Mail on some versions of Android.
-
Type your full email address, for example tony@contoso.com, and your password, and then select Next.
-
If prompted, select IMAP or POP, and then type your password.
Select Next.
NOTE If you're setting up a POP account, only your email will sync to your device. All your calendar and contacts remain stored on your local computer.
-
On the Incoming server settings page, check that your email address is correct.
-
Domain\Username Type your full email address in this box, for example, tony@contoso.com. If Domainand Username are separate text boxes in your version of Android, leave the Domain box empty, and type your full email address in the Username box.
-
Password Use the password that you use to access your account.
-
IMAP Server Use the address of your IMAP server. The server for Office 365 for business isoutlook.office365.com.
-
You might receive a message about additional security features. Select OK to continue.
When you select POP3 or IMAP you might need to add or verify your IMAP or POP, SMTP server names, ports, and encryption methods to complete the setup. If you're adding your work or school account and your organization uses Office 365 for business to host your email, the settings are listed in the table below. If you're not using Office 365 for business and don't know the necessary settings, contact your email provider.
Type of server
Server name
Port
Encryption method
POP3 (incoming server)
outlook.office365.com
995
SSL
IMAP4 (incoming server)
outlook.office365.com
993
SSL
SMTP (outgoing server)
smtp.office365.com
587
TLS
-
-
In Account name type a name for this account and the name you want displayed when you send e-mail to others.
-
Select Done.
TIP You may need to wait ten-to-fifteen minutes after you set up your account before you can send or receive email.
